


It’s Halloween here at Hawk Ridge Systems, and we take the holiday dead serious. To spook my fellow co-workers, I decided to undertake a project I’ve been mulling over since I read an article about one last Halloween; the Aztec Death Whistle.

The Aztec Death Whistle, rather than being a cursed object, is really just a cleverly shaped whistle that mimics the sound of the agonizing screams and wails of captives being tortured. Neat!
Since I didn’t have the genuine article to study (might need to buy one when I go down to Mexico in April!) I had to use the interweb. I was able to gather these cutaway views from various articles and google searches, with no real guarantee any of these are based on authentic Aztec Death Whistles and not themselves just approximate recreations. With this understanding, I knew I might have to take a few attempts to perfect the air pathways and resonating chamber to get the terrifying effect I’m after.


Next, I broke open SOLIDWORKS and set about making my prototype of the whistle air chambers. Since I didn’t have the time to make a skull and everything from scratch, I was already planning to use an STL or mesh body and carve away the internal chambers; so instead of creating a negative of the internal passageways, I went with a positive I could use as a subtraction tool later.
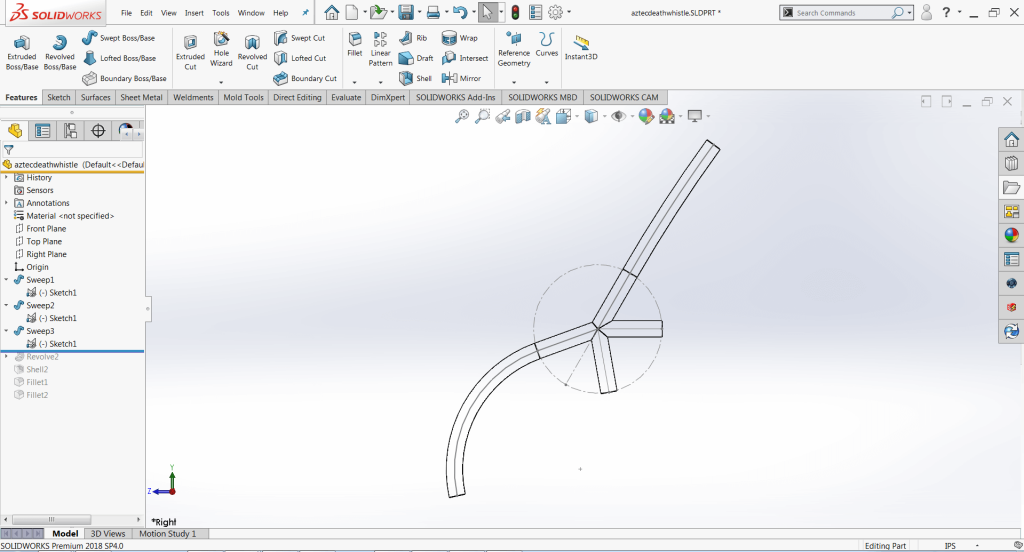
This involved making a very simple right-hand sketch of the path of the air passages first and then using the new Circular Profile options in the Sweep tool to get the areas where air would flow in and out.
Doing it this way also means I can come back and adjust the internal cavity shapes later to my heart’s content, and either update the whistle with the new internal geometry or create an entirely different whistle using the same internal geometry and a different body/exterior. This is important at this stage because I’m not 100% positive the geometry I have will even work, so I need to be able to quickly revise and update it later. The resonating chamber was added next, as a simple half circle Revolves and merge feature.

With the body of my whistles’ internal cavities finished, next, I turned my attention to the final whistle itself. As I mentioned earlier, I didn’t have the time to make a good quality skull model using surfacing tools and my (lack of) artistic ability meant I was going to do what every good engineer does; look for an off the shelf solution. Why reinvent the skull when others have for you? I went to Thingiverse and got this fantastic skull STL that was already watertight as a cohesive single body. This is a kind of important factor since I didn’t want to spend any time at all really cleaning up this skull model before adding my own geometry and printing a prototype. I want to try my whistle dang it! Credit to YahooJapan for the STL.

“But wait!” you say, knowing SOLIDWORKS doesn’t always play nice with STL files, “How are you going to use that geometry?”
Convert to Mesh Body baby.

Introduced in SOLIDWORKS 2018, Convert to Mesh Body has been one of my favorite hack and slash tools, making quick work of otherwise scary jobs. In this case, the thought of recreating this skull or making one from scratch or bringing in this STL and trying to convert facets into surfaces and knitting into a cohesive face/body is downright terrifying.
So instead, I opened the Skull STL, inserted my whistle body as a part, and converted both to mesh bodies. This allowed me to play with both sets of geometry using SOLIDWORKS tools and combine them together. I positioned the internal whistle cavity body where I wanted inside the Skull STL, and then I used the Combine tool to subtract away the areas of the Skull where air would flow. To cap it off, I created a mouthpiece using native SOLIDWORKS geometry, converted it to a Mesh Body, and then also Combined it with the rest of the shape. Now I had a full Aztec Death Whistle Prototype, and I could move on to 3D printing one for testing and refinement.


Finally, I exported this finished Mesh Body as an STL again, so I could load it into my slicer software for 3D printing. As of this writing, I am waiting for my prototype to leave the printer! Stay tuned for a future article where we simulate, test, and refine this Whistle using SOLIDWORKS Flow Simulation tools.


Create your own spooky designs with SOLIDWORKS by starting your FREE Trial Today!


 Animation, 3D Art and 3D Models")